
Discloud
How to host discord bot project on discloud hosting
Discloud is a cloud application hosting service.
Preparing the project
When generating the project using the CLI, you can select the 🗐 Discloud Files feature, which will include the files needed to upload your application to the hosting in the project.
Create the discloud.config file in the project root.
NAME=Awesome Bot
TYPE=bot
MAIN=build/index.js
RAM=100
VERSION=latest
AUTORESTART=false
START=npm run start
Create the .discloudignore file in the project root.
# Essential structure
# - /build
# - /.env
# - /.discloudignore
# - /discloud.config
# - /package.json

# Ignored structure

# Folders
/.vscode
/src
/deprecated
/discloud
/node_modules

# Files
/.env.development
/.env.dev
/.env.example
/.eslintrc.json
/.gitignore
/tsconfig.json
/README.md

# Extensions
*.md
*.zip
*.exe
*.development.json
Before uploading...
Make sure the project is builded!
To upload, your project must first be builded using the command below:
npm run buildIn the discloud.config file you can set a name and an avatar for your application on the hosting if you prefer.
    NAME=My Awesome Bot
    AVATAR=https://i.imgur.com/L7Mxhoj.gif
    # ...
Install the discloud extension in Visual Studio Code
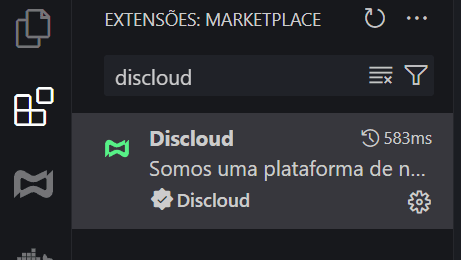
Click on the discloud tab on the sidebar of Visual Studio Code e place your discloud api token.
Then just click on Upload Discloud in the bottom bar of Visual Studio Code.
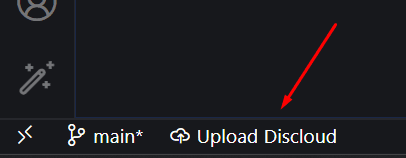
If your project does not contain any errors, it will start in a few moments.
If you don't want to use the Visual Studio Code extension, there are other ways to host and you can check them out here. Just remember to follow the requirements below:
- The folder that must be uploaded is
build, notsrc(That's why you need to build first). - The files and folders that must be uploaded are
build,.env,constants.json,package.json, anddiscloud.config
- Do not send the
node_modulesfolder. - It is necessary to set that the script to start is
npm run start.